How to Provide Impersonation Rights Using Powershell/EAC?
Impersonation rights help a service application to act like a regular user account. When a service application needs to perform some specific tasks as a user, then it requires permissions like those of a user account.
Let's see how we can assign impersonation rights using two methods -
- Assign impersonation rights using Windows PowerShell
- Assign impersonation rights using Exchange Admin Center
Assign Impersonation rights using Windows PowerShell
Windows PowerShell provides a command line interface to run command-lets (cmdlets) to access the application and make appropriate changes in the settings. You can run cmdlets to give impersonation right to any service account.
1. Start the Windows PowerShell as Administrator and run the command:
Set-ExecutionPolicy Unrestricted
This command will let you run every kind of script even if they are digitally signed or not.
2. Run the command:$livecred = Get-Credential
The command will input the Exchange Online credential of the Administrator account to a particular variable.
3. Run the command:$s = New-PSSession -ConfigurationName Microsoft.Exchange -ConnectionUri https://ps.outlook.com/powershell -Credential $cred -Authentication Basic -AllowRedirection
The command will create a new session for Exchange Online.
4. Run the command:$importresults= Import-PSSession $s
The command will import the Exchange Online session to the current session.
5. Run the command:New-ManagementRoleAssignment -Role "ApplicationImpersonation" -User admin@domain.com
The command will assign the impersonation rights.
Assign impersonation rights using Exchange Admin Center
The Exchange Admin Center provides a direct interface where you can assign impersonation rights easily.
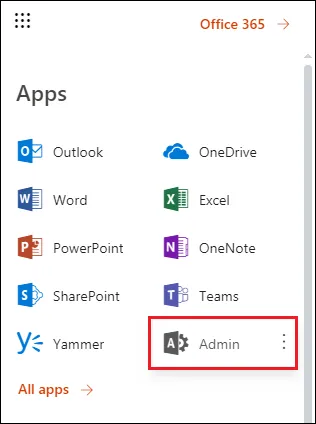
Step 1.Login to Office 365 using Administrator credentials. Then click the Adminoption under Apps.
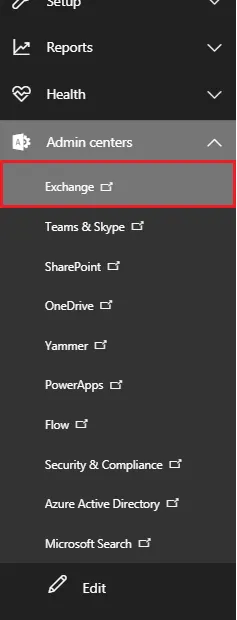
Step 2.Under admin centers, click Exchange.
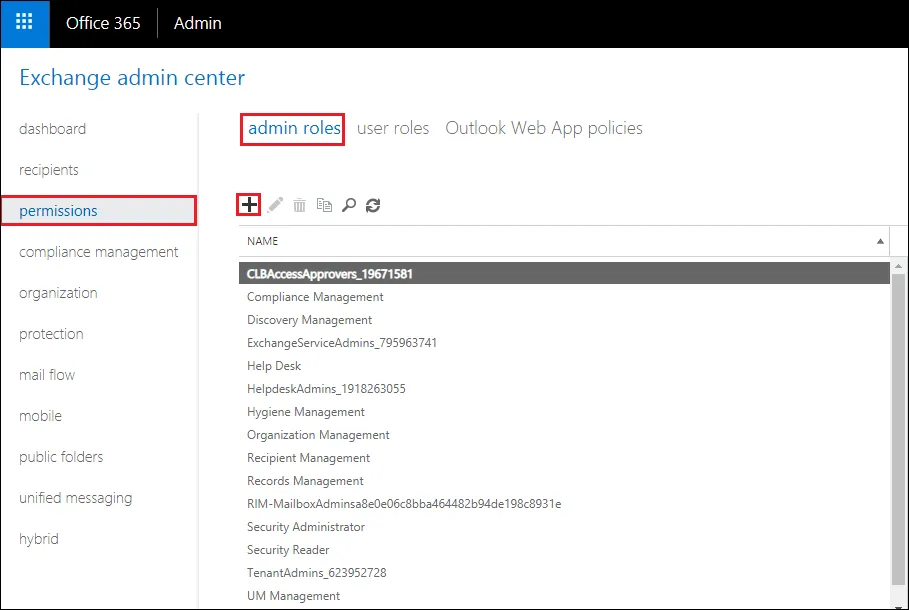
Step 3.In the permissionstab, go to admin rolesand click the + button.
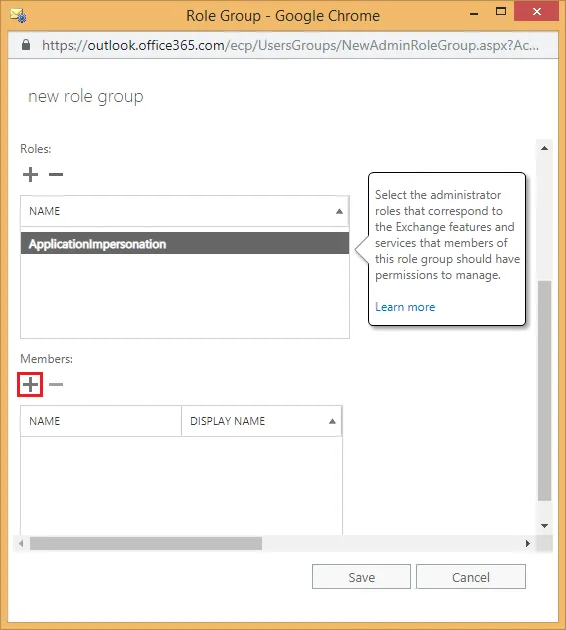
Step 4.Provide a new name to the role group, then click the + button under Roles.
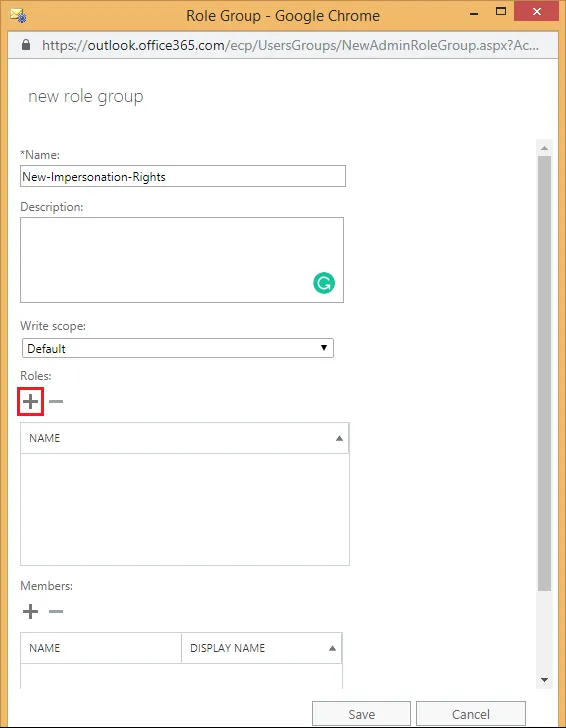
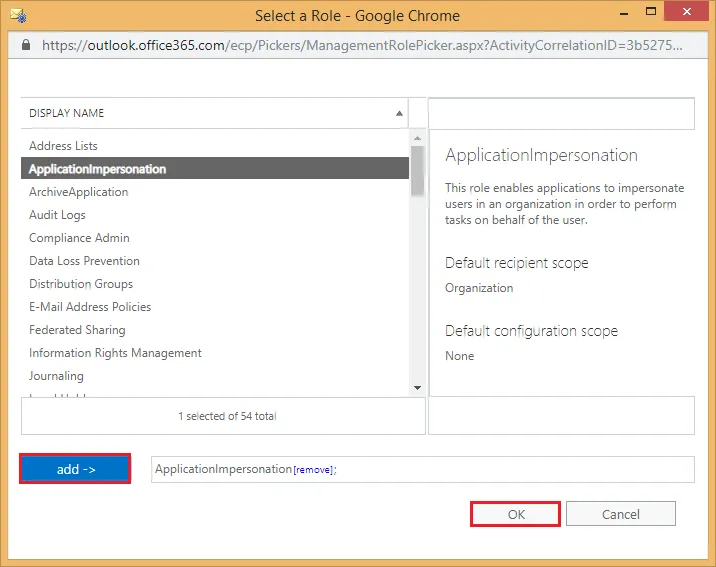
Step 5.Select the ApplicationImpersonationfrom the list and click Addbutton, then click OK.
Step 6.Click the + under the Memberssection.
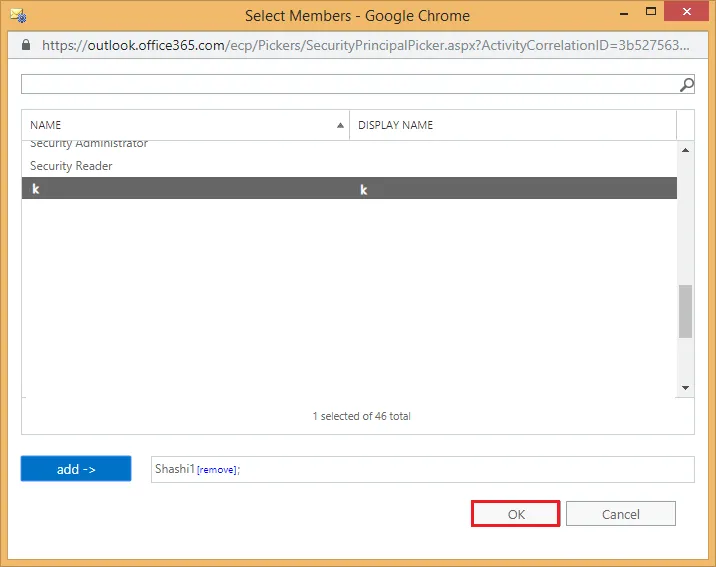
Step 7.Select a mailbox as the member of the role group and click the addbutton. Then click OK.
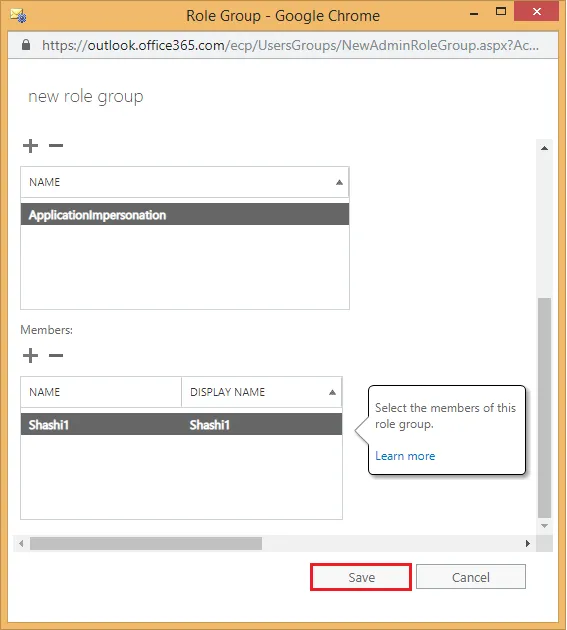
Step 8.Finally, click Save.
After completing the process, the impersonation role will be displayed under the recipients>admin rolesin the Exchange admin center.

